Setup bookmark application in Entra-ID for Spreadly
Read time
2 minutes
2 minutes
Date
20th of December 2023
20th of December 2023
In this article:
- 1. Create bookmark application
- 2. Set URL and logo for bookmark application
- 3. Hide default Spreadly application
Please Note: We suggest our customers to use SCIM provisioning with Single-Sign On instead of creating a bookmark application. See https://spreadly.app/en/blog/setup-user-provisioning-with-microsoft
To combine the power of our Private Logins with the App gallery of Microsoft 365, you can setup a bookmark application which looks like Spreadly redirects the user to the correct private login.
1. Create bookmark application

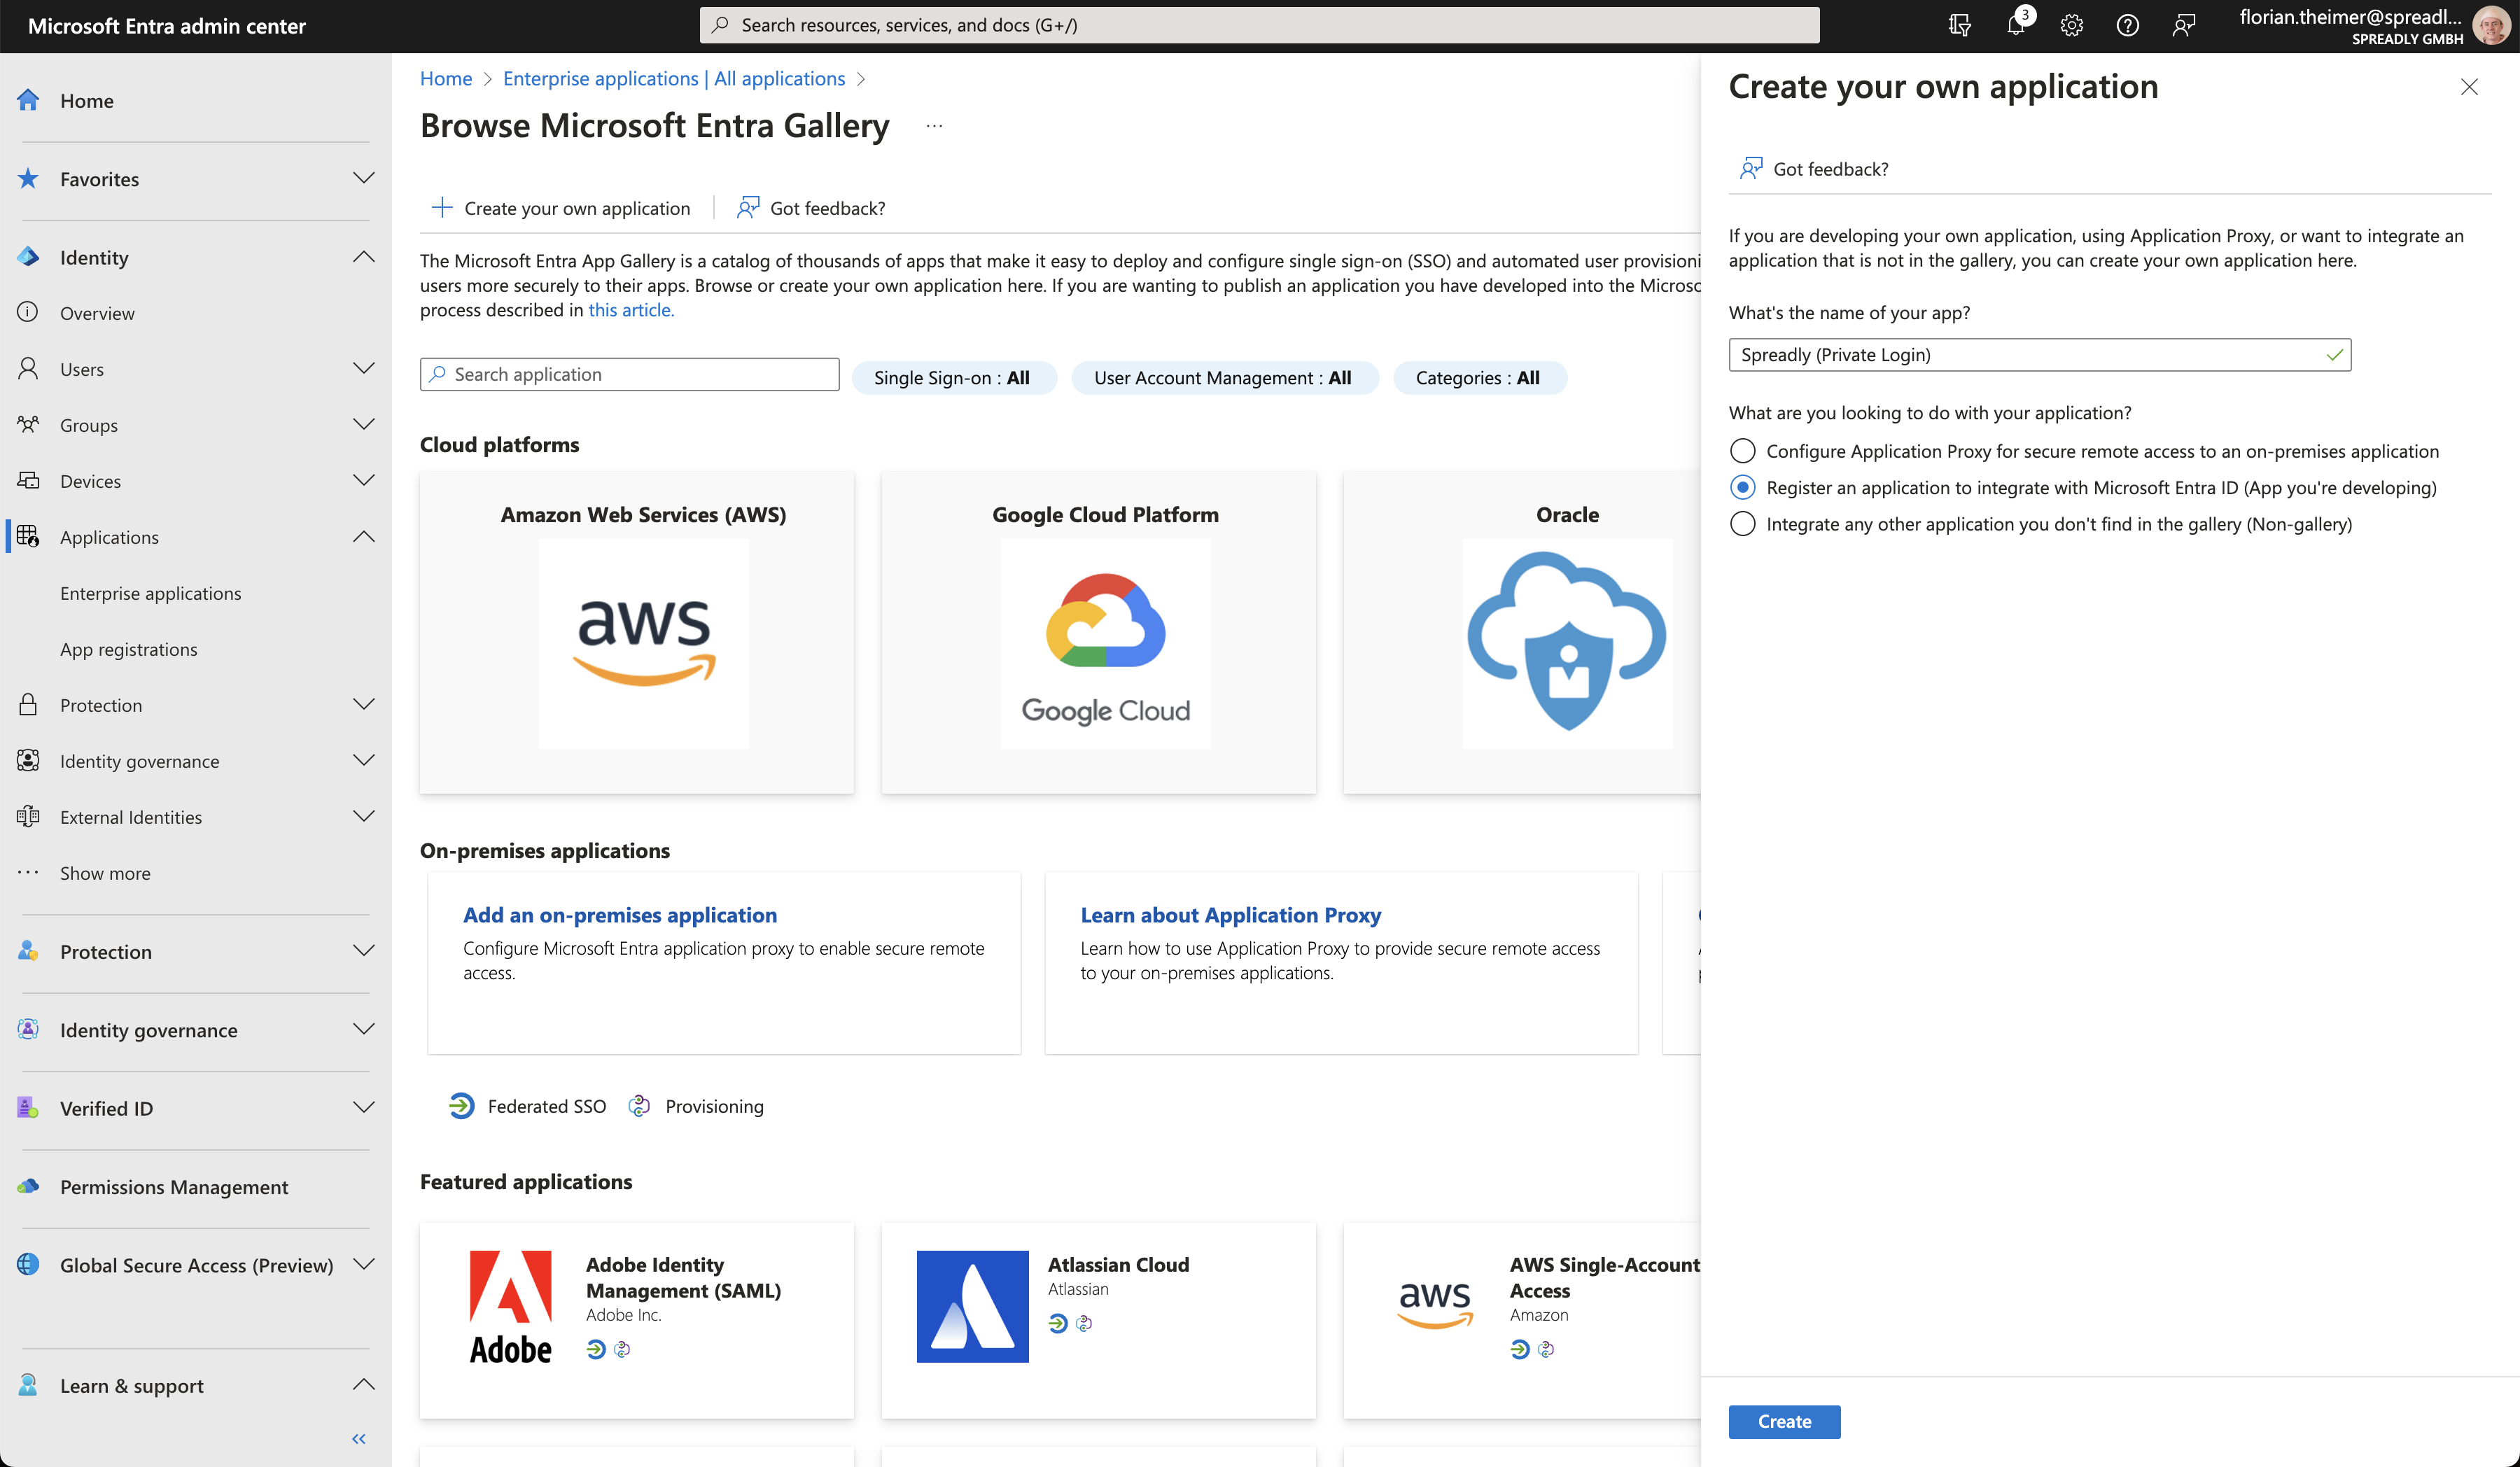
- Sign into your Entra-ID and go to Applications > Enterprise applications > + New applicaiton > + Create your own application to create the bookmark application.
- Enter "Spreadly" as the name of the application and select "Register an application to integrate with Microsoft Entra ID".
- On the next screen select "Accounts in this organizational directory only". A Redirect URI is not required.
- "Enable for users to sign-in", and "Visible to users" have to be enabled.
- Save the changes.
2. Set URL and logo for bookmark application

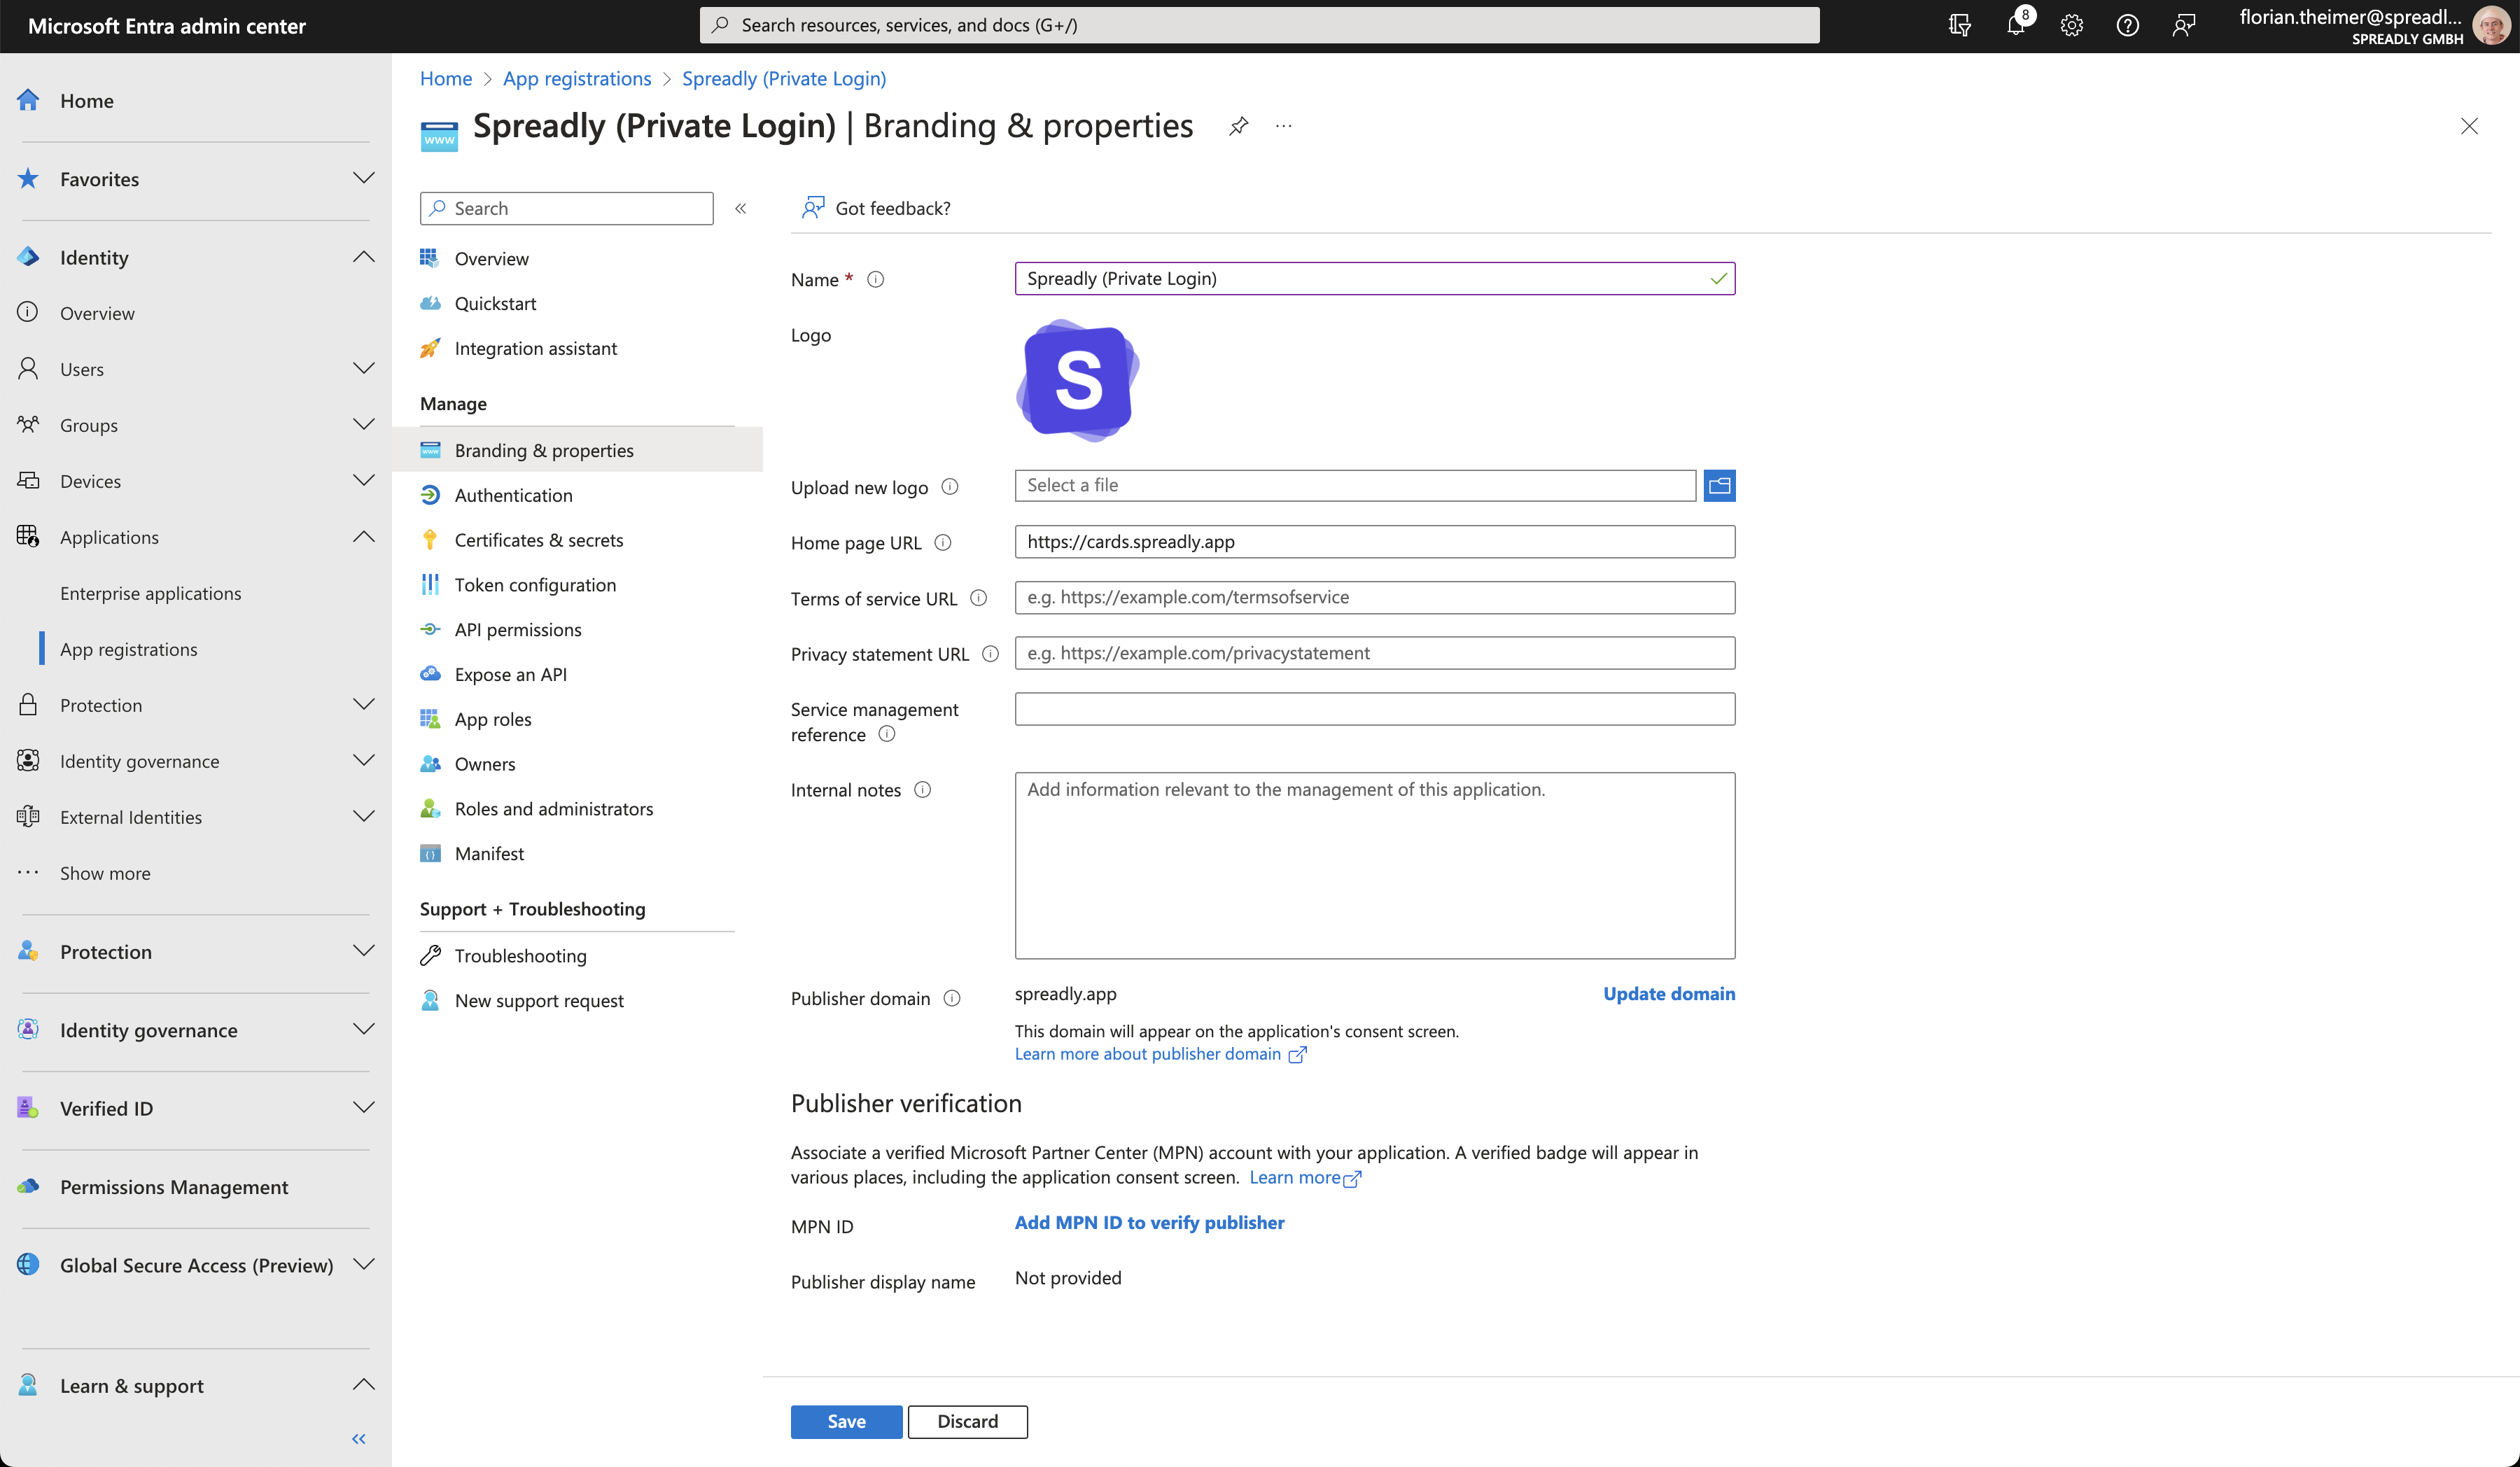
- After the bookmark application is created you edit the appearance under Applications > App registrations > Spreadly > Branding & properties.
- You can upload the Spreadly logo to improve the recognition. You can download the Spreadly logo here.
- Set the "Home page URL" to the link of your Private Login. You can find the Link in Spreadly "Team > Settings > Private Login".
- Save the changes.
3. Hide default Spreadly application

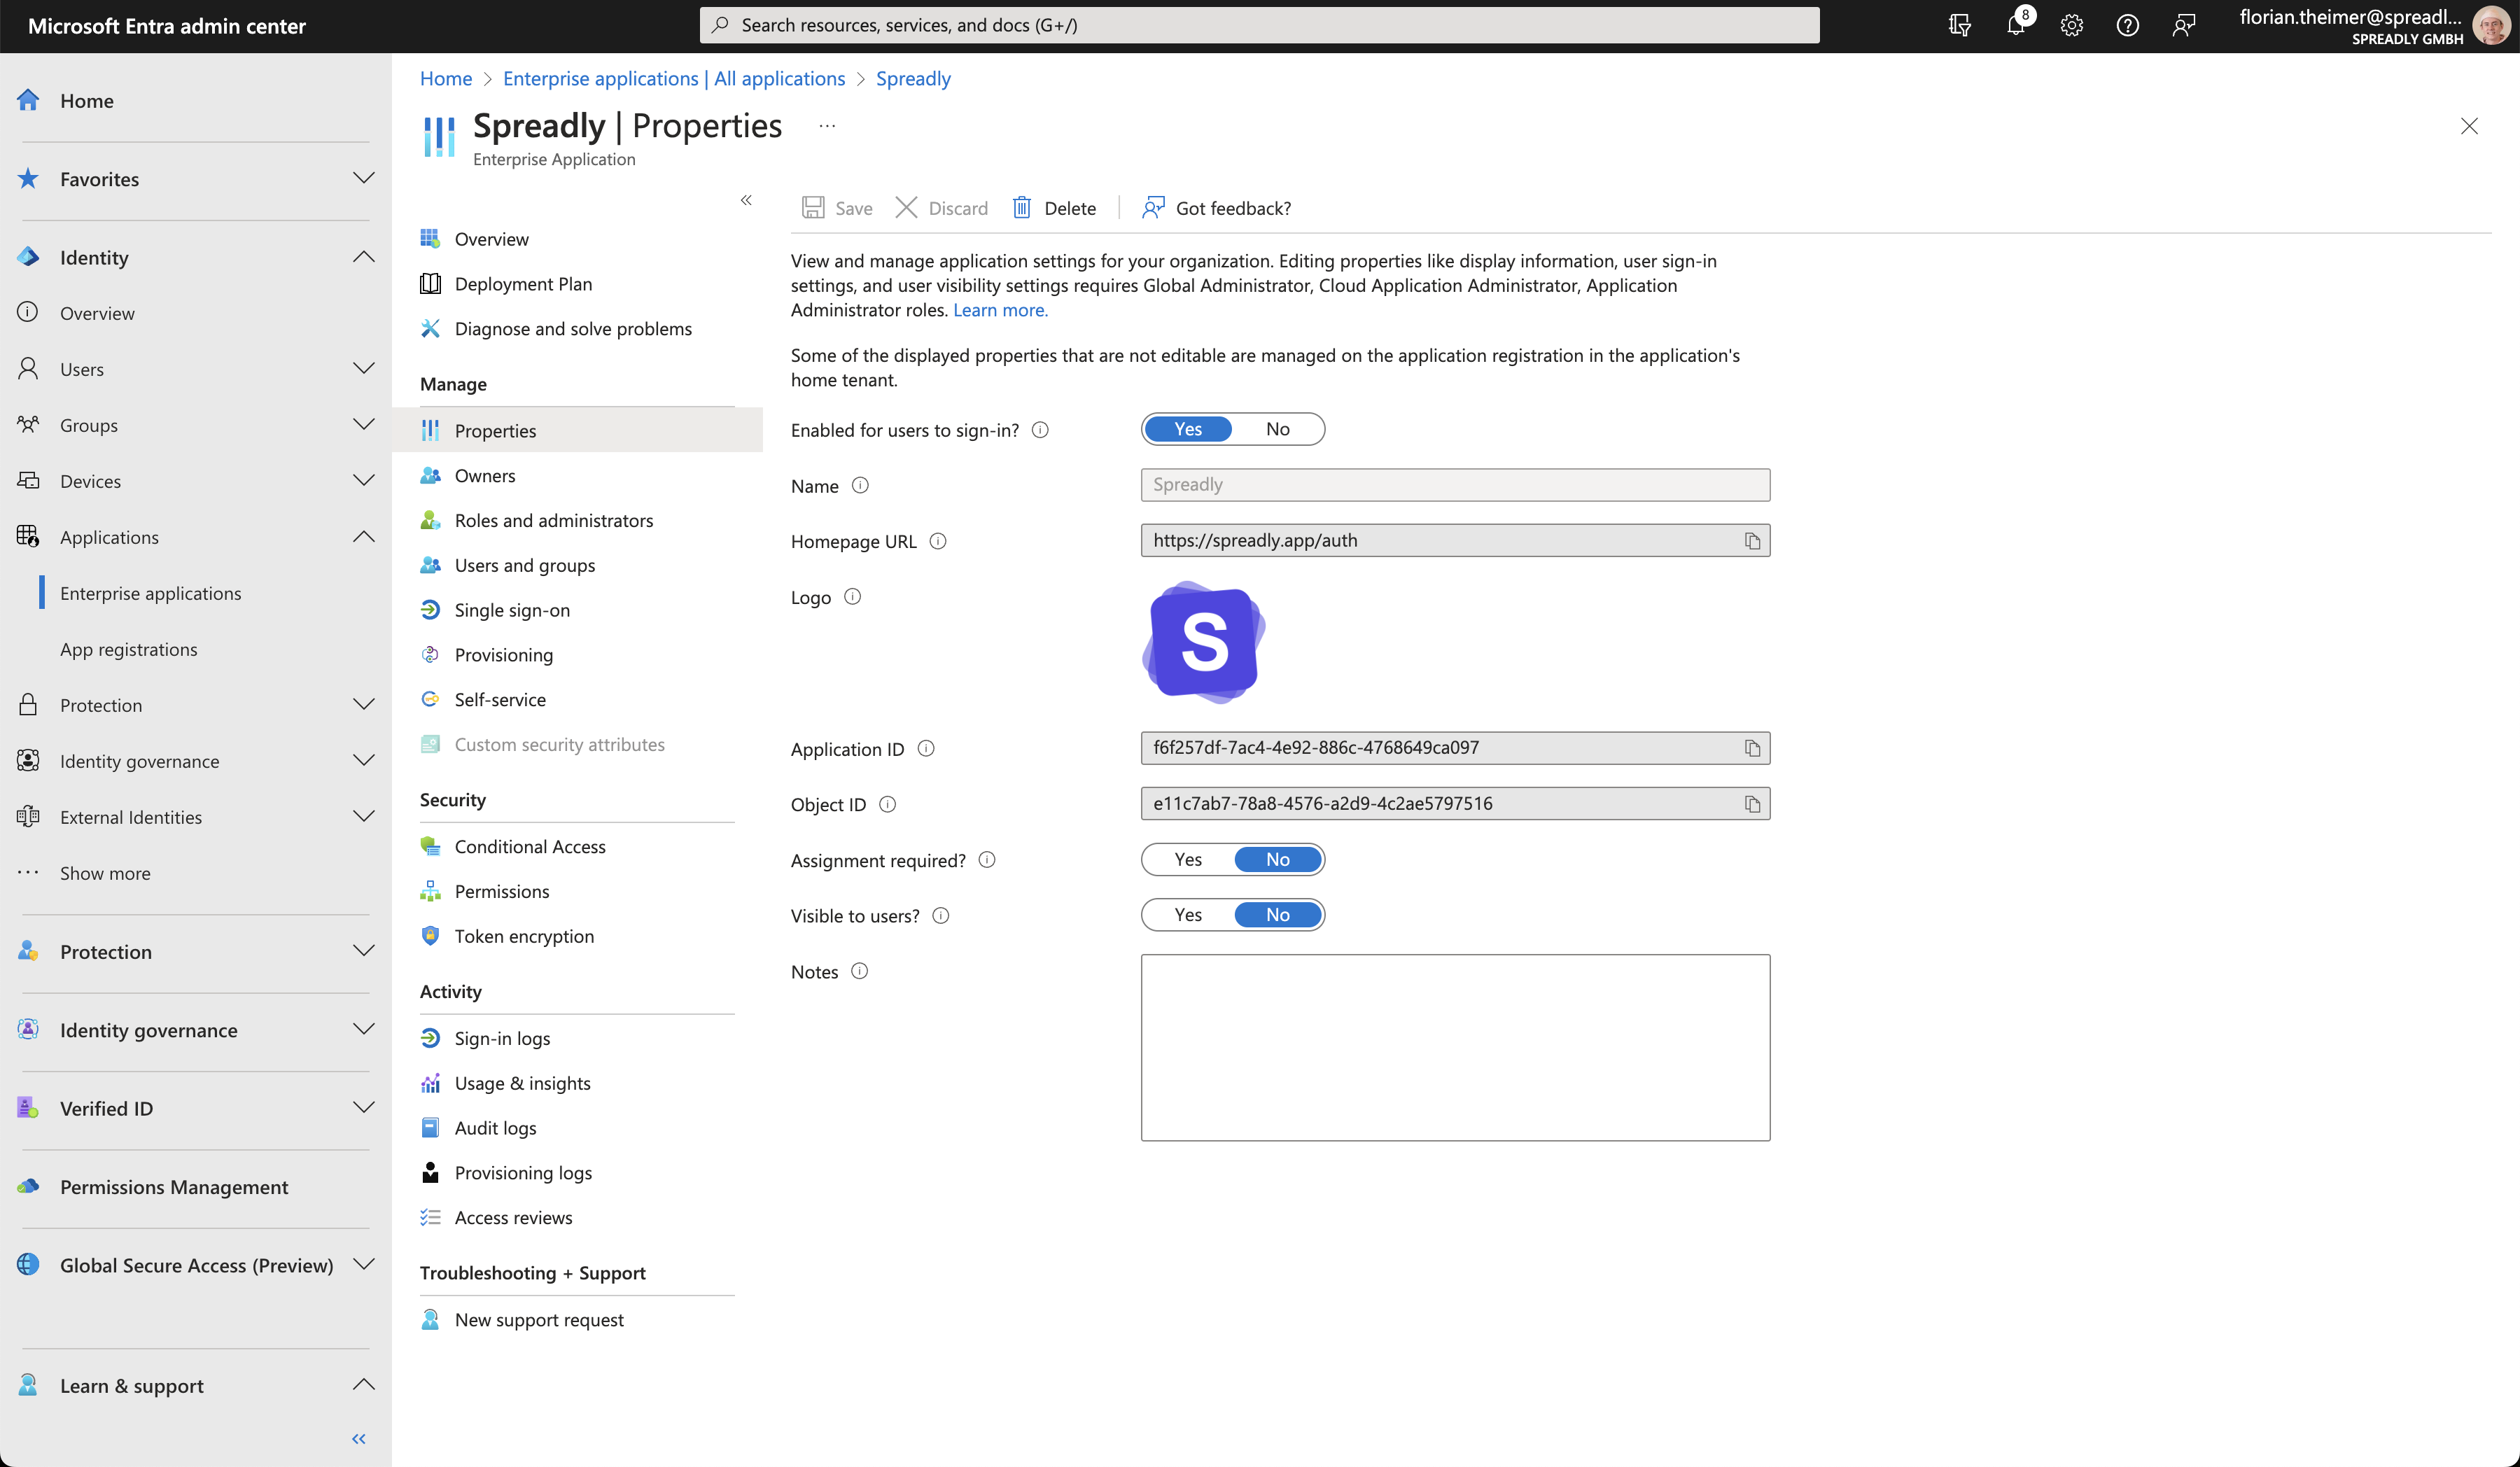
- Search for the general Spreadly application in Applications > Enterprise applications > Spreadly. (Application ID:
f6f257df-7ac4-4e92-886c-4768649ca097) - Disable the "Visible to users" settings.
- Save the changes.
Latest articles
Top Essentials to Start Your Business in 2026
15th of January 2026
•
17 minutes read time
Trade Fairs Paris 2026: Top Events & Guide
2nd of January 2026
•
5 minutes read time
Top Conferences in Milan 2026: Ultimate Guide
2nd of January 2026
•
6 minutes read time
Top Insurance Conferences in Germany 2026: Key Events
2nd of January 2026
•
3 minutes read time
Top Construction Trade Fairs in Germany 2026
2nd of January 2026
•
4 minutes read time

