Master placeholders in your email signature
3 minutes
3rd of September 2025
In this article:
Last month we showed you how to set up your first centralized signature in the Spreadly Signature Editor. This time, we’re going deeper with placeholders. They’re the secret sauce that makes your signatures dynamic, smart, and always up-to-date.
What are placeholders? Placeholders are variables you add inside double curly braces. When the email is sent, Spreadly fills them with the right info.
Examples:
- {{ user.first_name }}
- {{ user.last_name }}
- {{ user.title }}
- {{ user.phone }}
- {{ cards[ ].url }}
- {{ now }}
👉 Here you'll find a detailed list about using placeholders in Email Signatures
Step 1: Open the editor
Go to Email Signatures → choose your signature → open the editor. You’ll see your design on the left and a live preview on the right for any user you select.
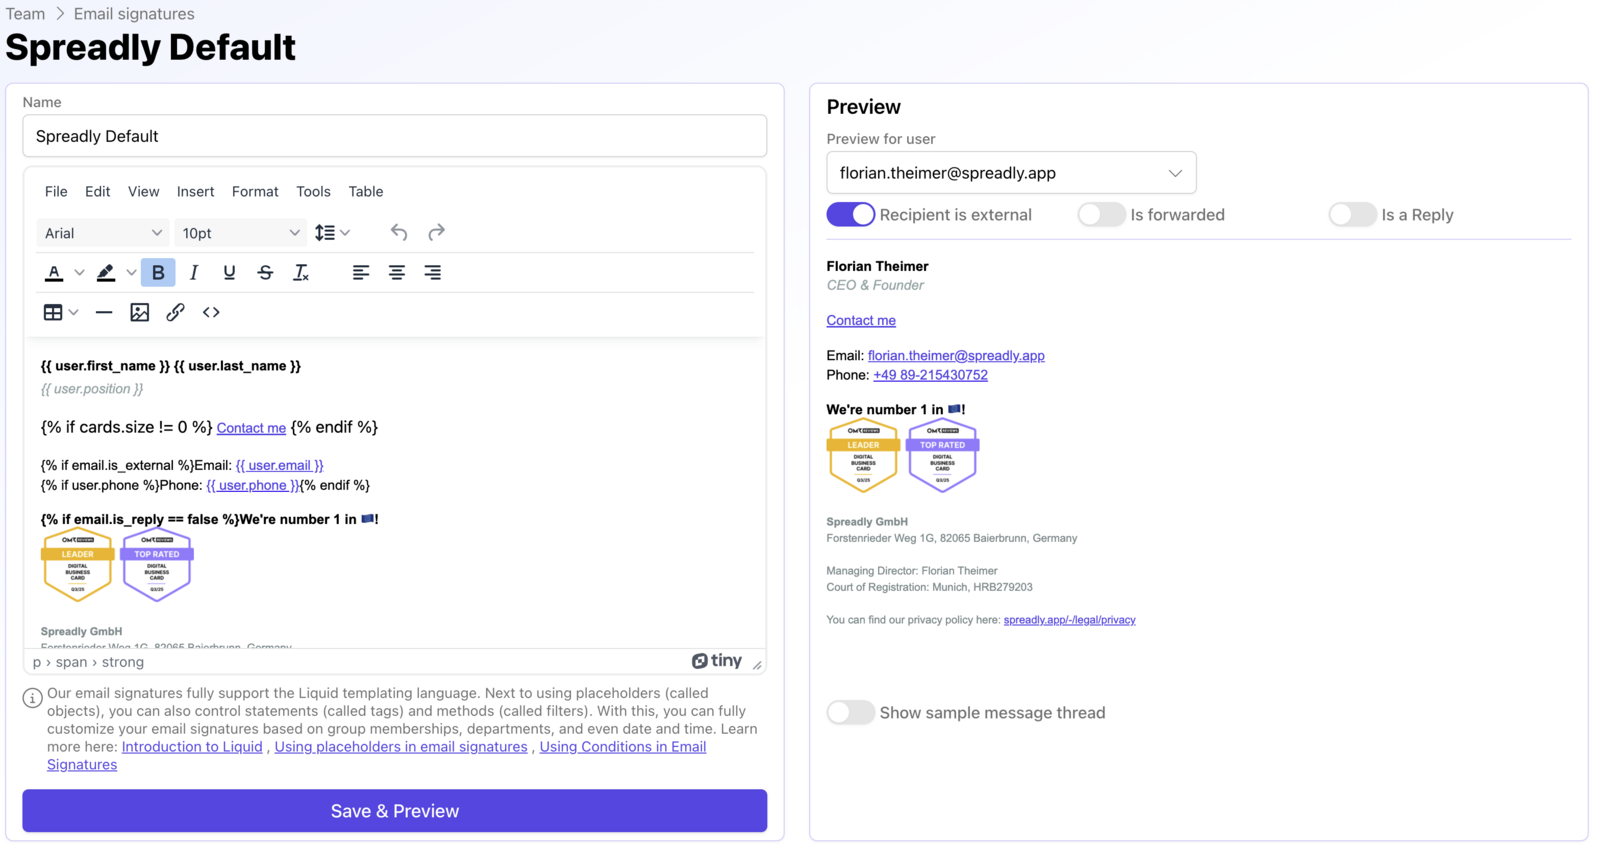
Helpful reference: Email Signature Editor
Step 2: Insert user placeholders
Type {{ user. and pick from the suggestions. Start with the essentials:
- {{ user.first_name }}
- {{ user.last_name }}
- {{ user.title }}
- {{ user.phone }}
- {{ user.email }}
Tip: Prefer {{ user.avatar_offline_url }} for profile images so avatars still show if trackers are blocked.
Step 3. Add links and branding
Mix placeholders with text and links just like regular HTML.
<strong>{{ user.first_name }} {{ user.last_name }}</strong><br>
{{ user.title }} | {{ user.company }}<br>
📞 <a href="tel:{{ user.phone }}">{{ user.phone }}</a>  |  ✉️ <a href="mailto:{{ user.email }}">{{ user.email }}</a><br>
Step 4: Add your digital business card
Show a link or QR to your Spreadly card. The simplest approach is to take the first available card.
Here are some placeholders you can use to link to your digital business card:
- {{ cards[ ].avatar_url }}: URL to the profile picture
- {{ cards[ ].name }}: Name of the card (usually your name)
- {{ cards[ ].qr_code_url }}: QR code URL for the digital card
- {{ cards[ ].url }}: Link to the digital business card
- {{ cards[ ].vcard_url }}: Download link for the vCard
Step 5: Use a tidy, proven layout
Here’s a compact signature block you can paste and adapt:
<strong style="font-size:14px">{{ user.first_name }} {{ user.last_name }}</strong><br>
<span style="color:#666">{{ user.title }}</span><br>
📞 <a href="tel:{{ user.phone }}">{{ user.phone }}</a>  |  ✉️ <a href="mailto:{{ user.email }}">{{ user.email }}</a><br>
🌐 <a href="{{ user.website }}">{{ user.website }}</a><br>
{% for card in cards limit:1 %}
🔗 <a href="{{ card.url }}">Digital business card</a>
{% endfor %}
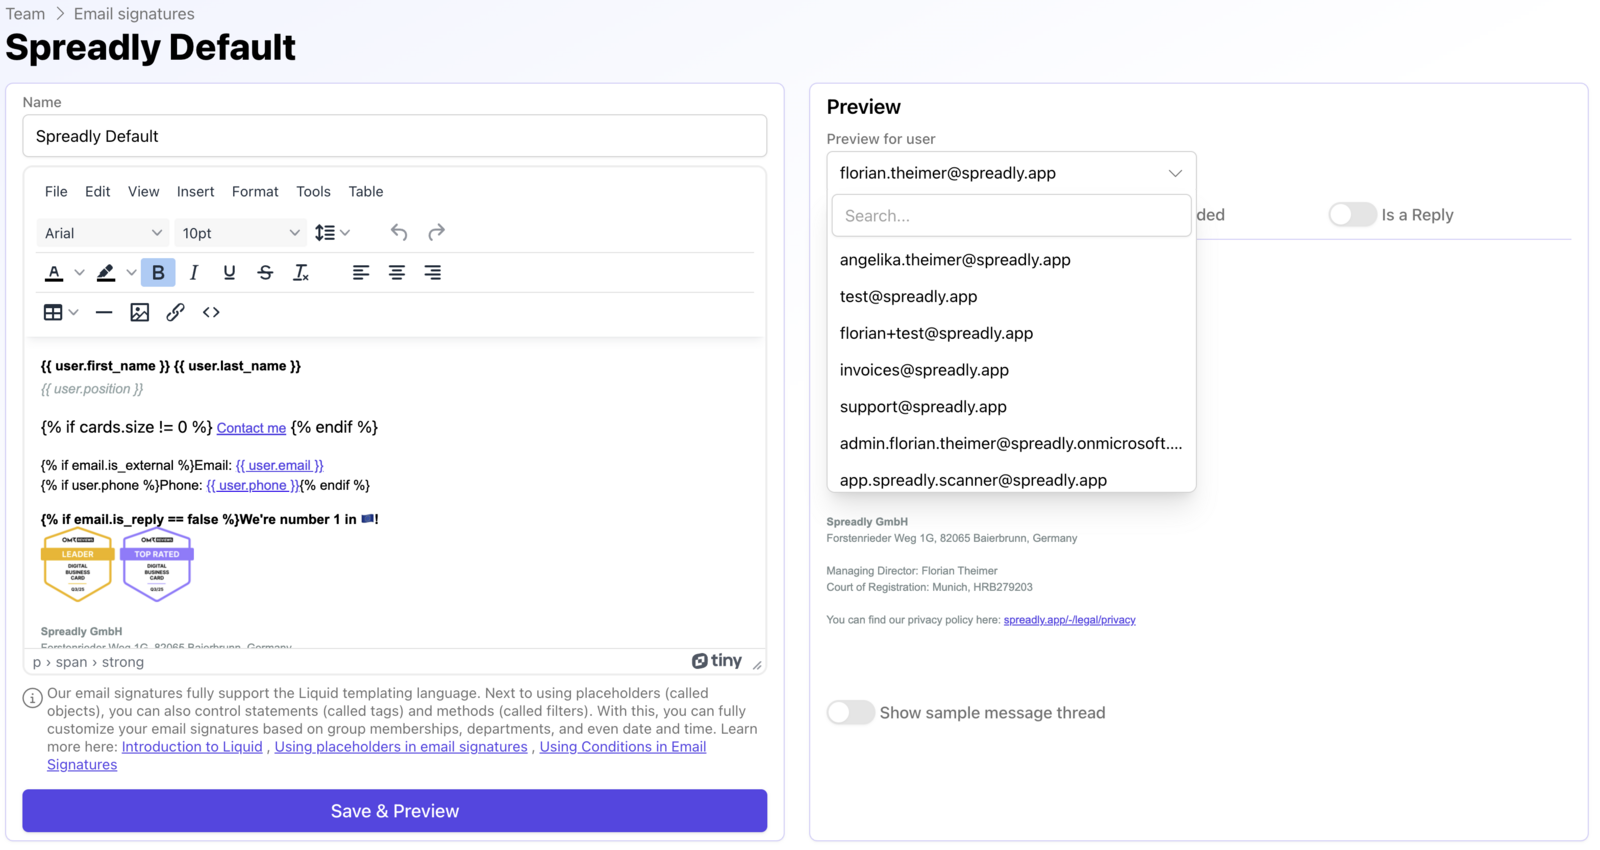
Step 6: Preview for any user
Use the user dropdown in the preview to check how it renders for different teammates. Fix spacing, line breaks and links until it looks perfect for everyone.
 Step 7: Save
Click Save & Preview. Your placeholders will now render with the right data whenever a user sends an email.
Pro tips for power users
Only show data if it exists
Light A/B ideas Use {{ random.boolean }} with conditions to rotate a banner or tagline for simple A/B experiments. (Details in the placeholders guide)
Current date stamp {{ now }} can add context in disclaimers or seasonal banners.
Checkout the deep dive on Using Conditions in Email Signatures to make your signatures smarter
Resources
- Using placeholders in Email Signatures
- Email Signature Editor
- Using Conditions in Email Signatures
- How to Distribute Email Signatures
- Use Spreadly Outlook Add-in
- How to Create new Email Signatures
We hope this guide was helpful! Now it’s your turn, start adding placeholders to make your email signatures smarter, more personal, and ready for your team.