How to Design a Card Step by Step for Beginners
9 minutes
8th of November 2026
In this article:
- What You Need Before You Start
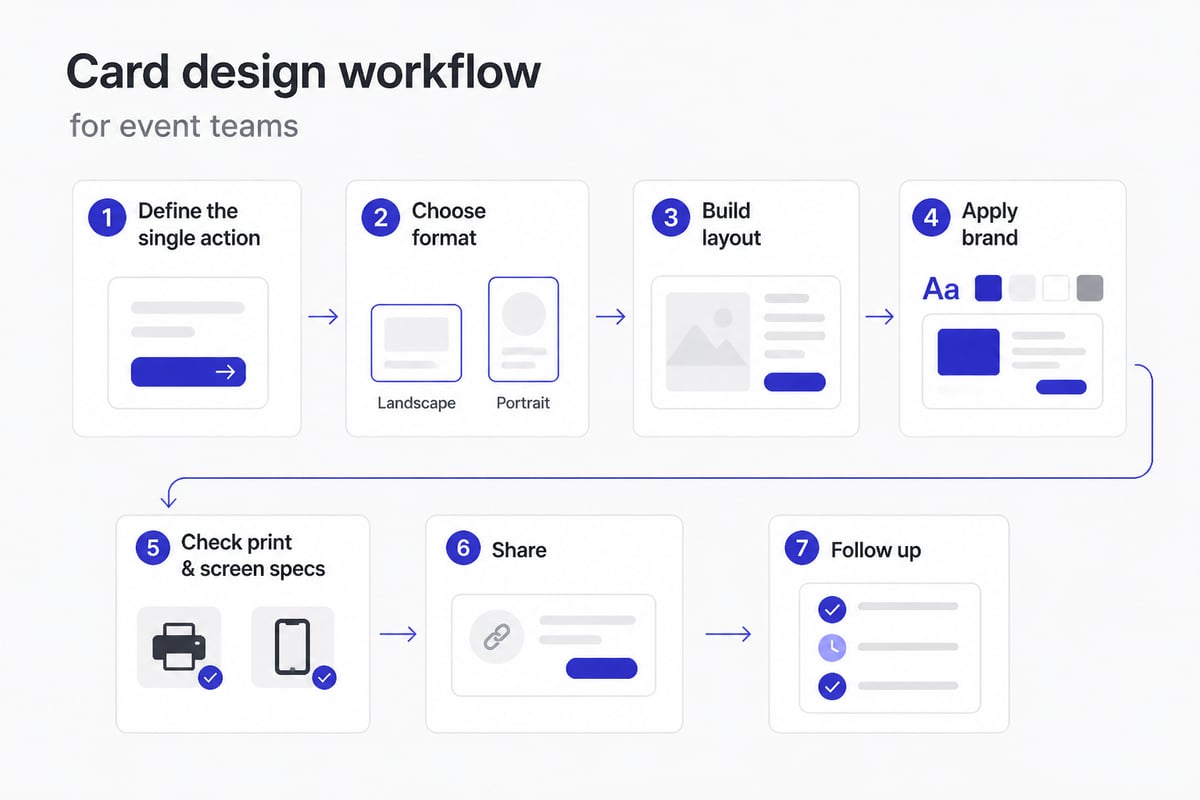
- Step 1: Define the Purpose and the Single Action
- Step 2: Choose the Card Format
- Step 3: Build a Layout With Clear Visual Hierarchy
- Step 4: Apply Your Brand Colors, Logo and Typography
- Step 5: Check Print Specifications Before You Export
- Step 6: Design for the Screen and the Scan
- Step 7: Add Lead Capture and Follow-Up Logic
- Step 8: Set Up Sharing for the Whole Team
- Step 9: Test, Print a Proof and Launch
- Plan the Follow-Up Window Before the Event
- Common Mistakes and Troubleshooting
Card design is the process of arranging a logo, text, color and a clear next action on a small surface so that someone can understand who you are and contact you in seconds. For a beginner, that means working through a short sequence: define the goal, pick a format, build a layout, apply your brand, check technical specs and decide how the card is shared. This guide walks through each step with trade show and event teams in mind, where a card has to work in a crowded hall and lead to a follow-up within days.
What You Need Before You Start
You need very little to begin: a clear purpose, your brand assets and a way to preview your work at actual size.
Gather the following before opening any design tool:
- Brand assets: logo files (vector preferred, such as SVG or PDF), brand colors with hex codes and your corporate fonts.
- Contact details: name, job title, company, work email, phone number and one website or booking link.
- A goal for the card: for example, "book a meeting after a trade show conversation" or "send prospects to a product demo."
- A design tool: a basic editor, a template-based platform or a digital card builder.
- A size reference: a ruler or a printed mockup so you can judge legibility at real dimensions.
If your team attends events across Europe, also confirm which languages and which legal details (for example, company registration lines in email signatures) your materials must carry. Settling this first prevents rework later.
Step 1: Define the Purpose and the Single Action
The first step in card design is deciding what one action the card should prompt, because every later choice depends on it.
A card that tries to do five things does none of them well. Choose one primary action:
- Save my contact details.
- Book a meeting.
- Visit a product page.
- Submit a lead form.
For event teams, the most useful action is usually "save my contact and book a call," since a lead that is not followed up within days tends to go cold. Write that action as a sentence before you design anything. Every element you add should support it, and anything that does not should be removed.
Step 2: Choose the Card Format
Pick the format that matches how you meet people: a printed card, a digital card, or a combination of both.
| Format | Strength | Limitation |
|---|---|---|
| Printed card | Tangible, no device needed | Cannot be updated after printing |
| Digital card (link, QR code) | Updates instantly, can hold video, files and forms | Needs a phone scan or tap |
| NFC card | Tap to share, reusable | Requires a compatible phone |
At a busy booth, a hybrid usually works best: a physical item that opens a living digital profile. If you plan to hand out physical cards, the guide to business card design and print covers sizes and materials in more detail. If your contact details change often, a digital card avoids reprints entirely.
Step 3: Build a Layout With Clear Visual Hierarchy
A strong layout puts the most important information first and gives every element enough space to be read at a glance.
Visual hierarchy is the order in which the eye moves across a design. The Nielsen Norman Group offers a useful overview of visual design principles covering hierarchy, contrast and spacing, all of which apply directly to a card.
Use this reading order as a starting point:
- Name in the largest type.
- Job title and company in a smaller, lighter weight.
- One primary contact method (email or phone).
- A QR code or link that leads to the full profile.
Keep generous margins. Crowded cards look amateur and are hard to scan under booth lighting. Limit yourself to two typefaces, ideally your brand's own, and avoid decorative fonts that lose legibility at small sizes. If you want layout inspiration before committing, these modern business card ideas show how simple structures stay effective.
Step 4: Apply Your Brand Colors, Logo and Typography
Applying your brand consistently makes a card recognizable and builds trust, particularly when several colleagues hand out cards from the same company.
Place the logo where the eye lands first or last, usually the top left or the bottom of the card, and give it clear space equal to roughly the height of one letter in your company name. Use no more than two or three brand colors, and test contrast: dark text on a light background is the safest choice for readability.
For teams, consistency matters more than individual taste. When ten people attend the same fair, ten slightly different cards weaken the brand. A shared template with locked fonts and colors solves this. Spreadly's editor lets you upload a logo, set custom colors and fonts (including corporate fonts) and control the layout, and the guide on business card logo design explains how to size and position a logo so it stays sharp.
Step 5: Check Print Specifications Before You Export
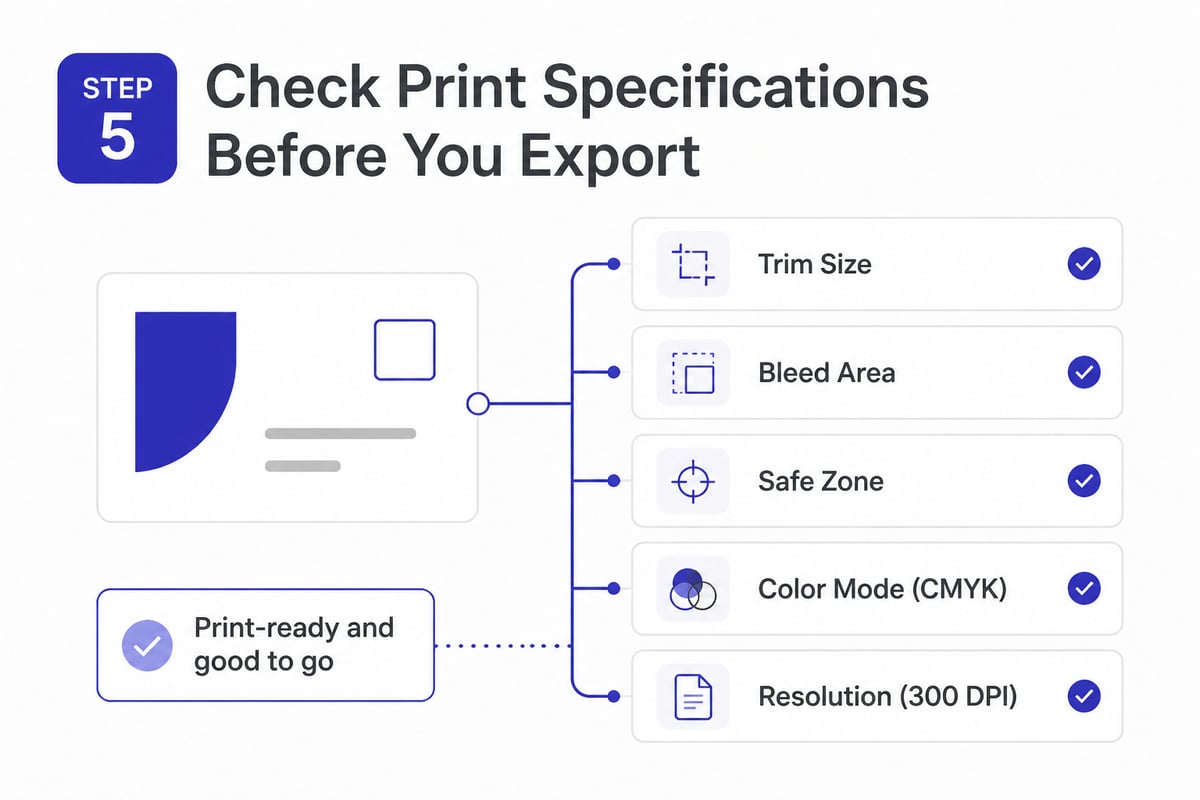
If your card will be printed, the technical specifications decide whether the result looks sharp or ruined at the edges.
Three settings matter most:
- Resolution: Printed.com recommends at least 300 dpi at the final printed size for print-ready artwork.
- Bleed: the same source recommends at least 3 mm of bleed on all edges, though some products require a different amount. Always check your printer's template.
- Safe area: MOO's design guidelines suggest keeping important text and logos inside a 3.97 × 5.69-inch safe area on a greeting card with a 4.13 × 5.83-inch trim size, and using text of at least 8 pt.
Those MOO figures apply to greeting cards, so scale the principle to your own format: bleed extends backgrounds past the cut line, and the safe area keeps text away from the edge so a slight trimming shift does not clip it. Export a PDF with the bleed included, and ask your printer for a proof if the order is large. For a deeper look at preparing files, see the notes on business cards printing.
Step 6: Design for the Screen and the Scan
A digital card has its own checks: it must load fast, read well on a phone and be easy to scan in poor light.
Run through these points on a real phone, not only on a desktop preview:
- Text is readable without zooming.
- Buttons are large enough to tap with a thumb.
- The QR code has high contrast and a quiet border around it.
- Background videos or images do not make the text hard to read.
- The profile loads quickly on a mobile connection, such as hall Wi-Fi.
Trade fair venues are often noisy for networks, so keep media files lean. Rich content such as a product video or brochure is valuable, but place it below the primary contact and lead options so it never delays the essentials.
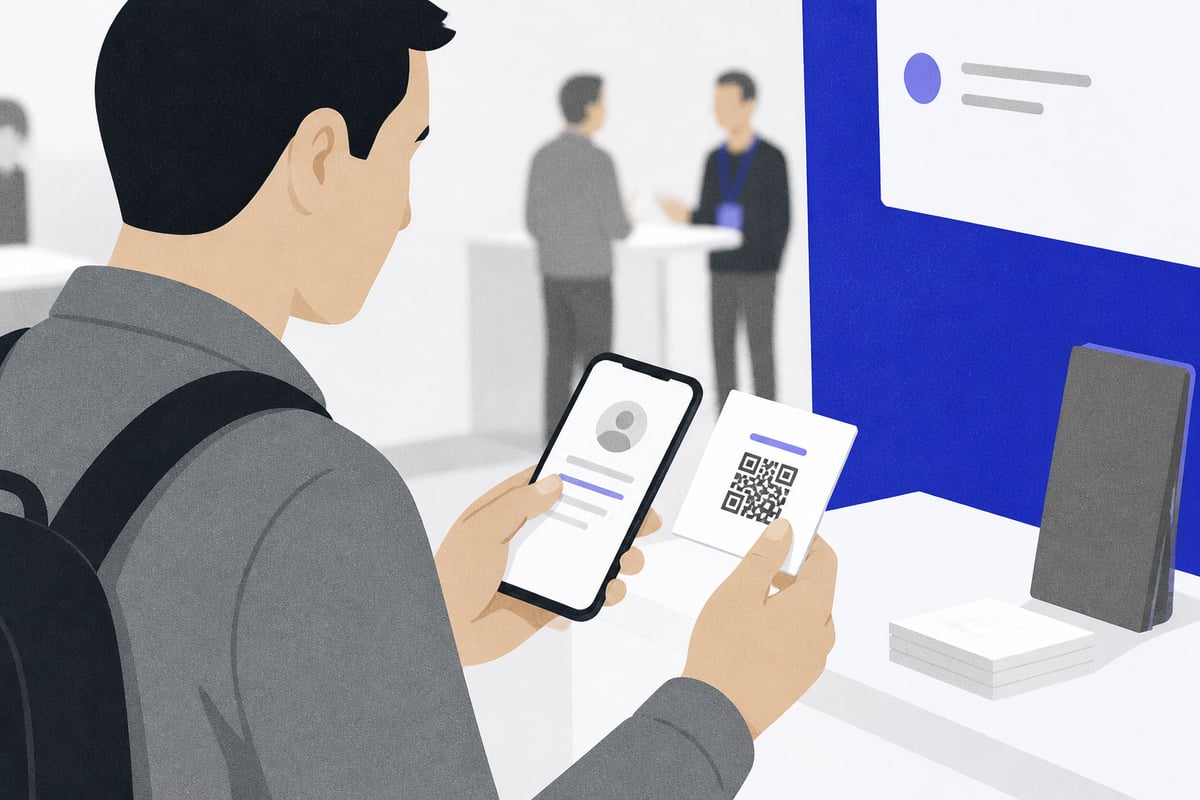
Step 7: Add Lead Capture and Follow-Up Logic
A card becomes a sales tool when it records who engaged with it and passes that information to your team without manual typing.
This is where card design differs for event teams compared with casual networkers. The design question is not only "what does it look like" but "what happens after the scan." Add a short lead form with two or three fields, a scheduling link and a clear button label such as "Book a 15-minute call."
Spreadly digital cards include built-in lead forms and scheduling integrations such as Calendly, and lead capture sends every lead with full context straight to your CRM. Contacts are saved in seconds, so prospects do not have to type or scan your details. For the incoming side, an AI business card scanner is built to read cards across many languages, which helps when you collect paper cards from visitors at a multilingual European fair. If your sales stack matters, read about a business card scanner with CRM integration so follow-ups land where your team already works.
Step 8: Set Up Sharing for the Whole Team
Decide in advance how every colleague will share the card, because speed at the booth depends on one consistent method.
Common sharing options include a personal link, a QR code on a badge or roll-up banner, an NFC card, a wallet pass and an email signature. A QR code on the badge works well because it requires no extra item to carry. Adding the card to Apple Wallet or Google Wallet gives you a lock-screen shortcut that is faster than opening an app.
For companies, central control prevents the common problem of outdated cards. Spreadly supports HR integrations such as Microsoft Entra ID, BambooHR and Personio, so cards are created and updated automatically when a role or phone number changes. Email signatures are managed centrally and kept consistent across the whole company, which keeps the post-event follow-up emails on brand as well.
Step 9: Test, Print a Proof and Launch
Test the finished card the way a real prospect would meet it, then fix what fails before the event.
Use this short checklist:
- Scan the QR code on two different phones, one iOS and one Android.
- Submit your own lead form and confirm it arrives in the CRM.
- Read the card at arm's length for the legibility check.
- Print a draft at actual size and hold it under bright and dim light.
- Ask a colleague who has never seen it to find your email and booking link in five seconds.
If any step takes longer than expected, simplify the layout. Setup of a digital card in Spreadly takes under two minutes, which leaves time for testing rather than building. Teams that want a faster start can also look at how to design an NFC business card with the editor.
Plan the Follow-Up Window Before the Event
Designing the follow-up as part of the card, rather than after the fair, is what turns scans into meetings.
Before the event, agree on three things as a team:
- Who contacts whom: assign leads by region or product so nobody waits for an owner.
- The response window: for example, a first message within 24 to 48 hours.
- The message template: a short email referencing the conversation, with the booking link repeated.
Because lead capture passes context into the CRM, a sales representative can open the record on the train home and write a specific message instead of a generic one. This planning step costs an hour and often decides whether a trade show produces pipeline or only a stack of cards. Teams with a regional footprint, whether they hire an AI marketing agency to support campaigns or run internal outreach, benefit from having the contact record complete on day one.
Common Mistakes and Troubleshooting
Most weak cards fail for a handful of predictable reasons, and each has a quick fix.
- Too much information. If the card holds more than six data points, remove the least useful. Link to a profile for everything else.
- Low-contrast text. Light gray on white or text over a busy photo fails in real lighting. Add a solid overlay or switch to a darker text color.
- Skipping bleed and safe area. White slivers on trimmed edges and clipped text come from ignoring the printer's template. Recheck the 3 mm bleed guidance and keep text inside the safe zone.
- A QR code that is too small or too crowded. Give it a clear margin and test it from the distance a person would normally scan.
- No single call to action. Visitors given three options often pick none. Return to Step 1 and keep one.
- Outdated details. Printed cards cannot be corrected. If roles or numbers change often, a link-based card avoids waste, and the overview of hidden costs with paper business cards shows how reprints add up.
- Inconsistent team cards. Different fonts and colors across colleagues dilute the brand. Use one locked template.
If a QR code will not scan, check that the link is correct, the code is not stretched, and the contrast between code and background is strong. If a form submission does not reach your CRM, confirm the integration is connected and reauthorize the account if needed.
Your next step is to write down the one action your card should prompt, then build a draft of that card and test it on your phone before your next event. When you are ready to turn that draft into a shareable, always-current card with lead capture and CRM sync, Try Spreadly free and have your first card ready to share in under two minutes.